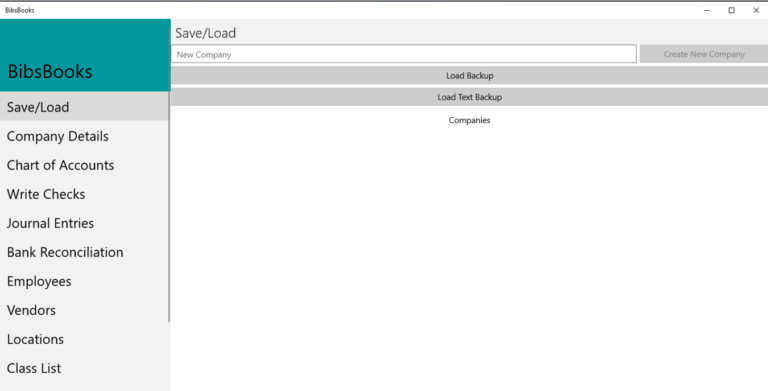
In the entry field labeled “New Company” enter your new company name.
Click the Create New Company button.
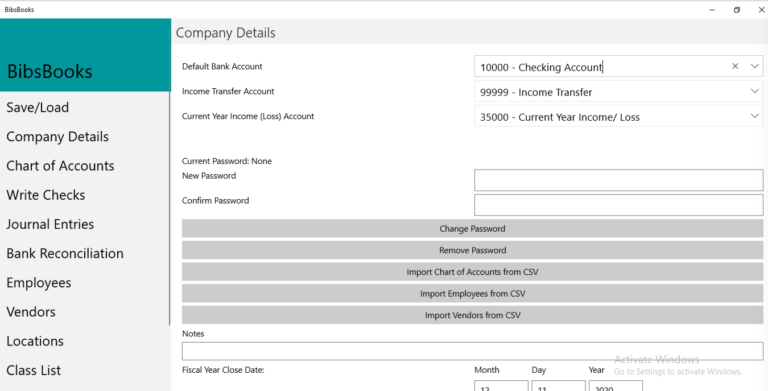
Set up your default bank account and the Income/ Loss Account!
A bank account and an income/ loss account is required for BibsBooks to fully function.
Using Excel or Google Sheets you can import in a Chart of Accounts with a .csv file that may already have the needed bank account and income/ loss account. You assign the accounts by clicking Company Details in the menu.
If manually adding your chart of accounts,
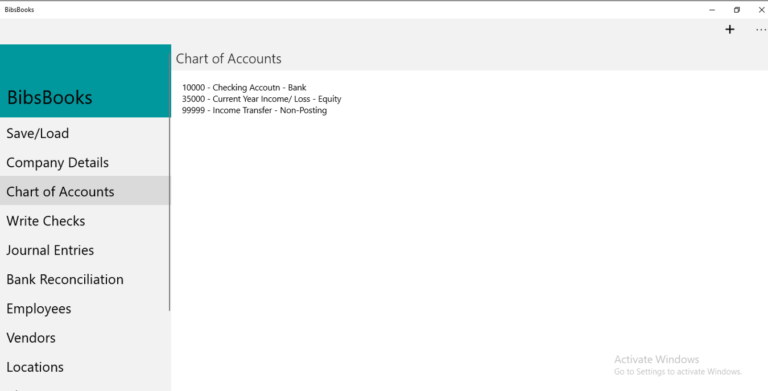
Click Chart of Accounts on the menu.
Click the + icon in the top right corner to add a new account.
Assign a Chart of Accounts Number, Select “Bank” as the account type, Enter your Bank Account Name. Click done.
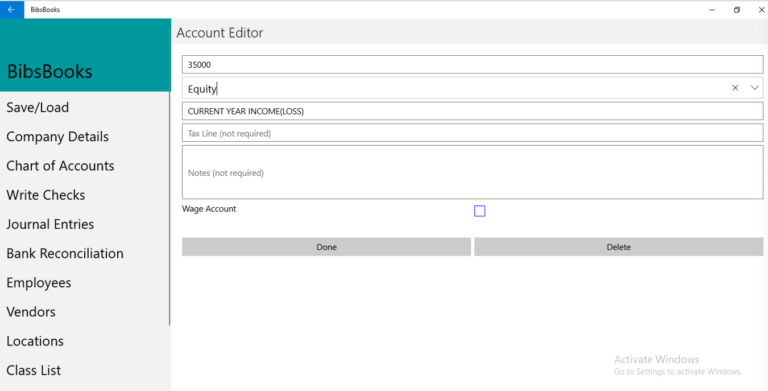
Click the + icon in the top right corner to add a new account.
Assign a Chart of Accounts Number, Select “Equity” as the account type, Enter your Account Name(i.e. Current Year Income/Loss). Click done.
Click Company Details on the menu.
Use the dropdown menu to set a Default Bank Account and Current Year Income (Loss) Account.
Start Using BibsBooks!
Add the rest of your chart of accounts, employees, vendors, locations and classes.